Installation
Before you begin
Ensure access to the Whalebone Portal.
Confirm network access on TCP 443.
If rolling out to multiple users, prepare your MDM or Active Directory environment.
Portal configuration
Log in to the Whalebone Portal.
Navigate to Home Office Security, located in the menu under the user icon in the upper-right corner of the screen.

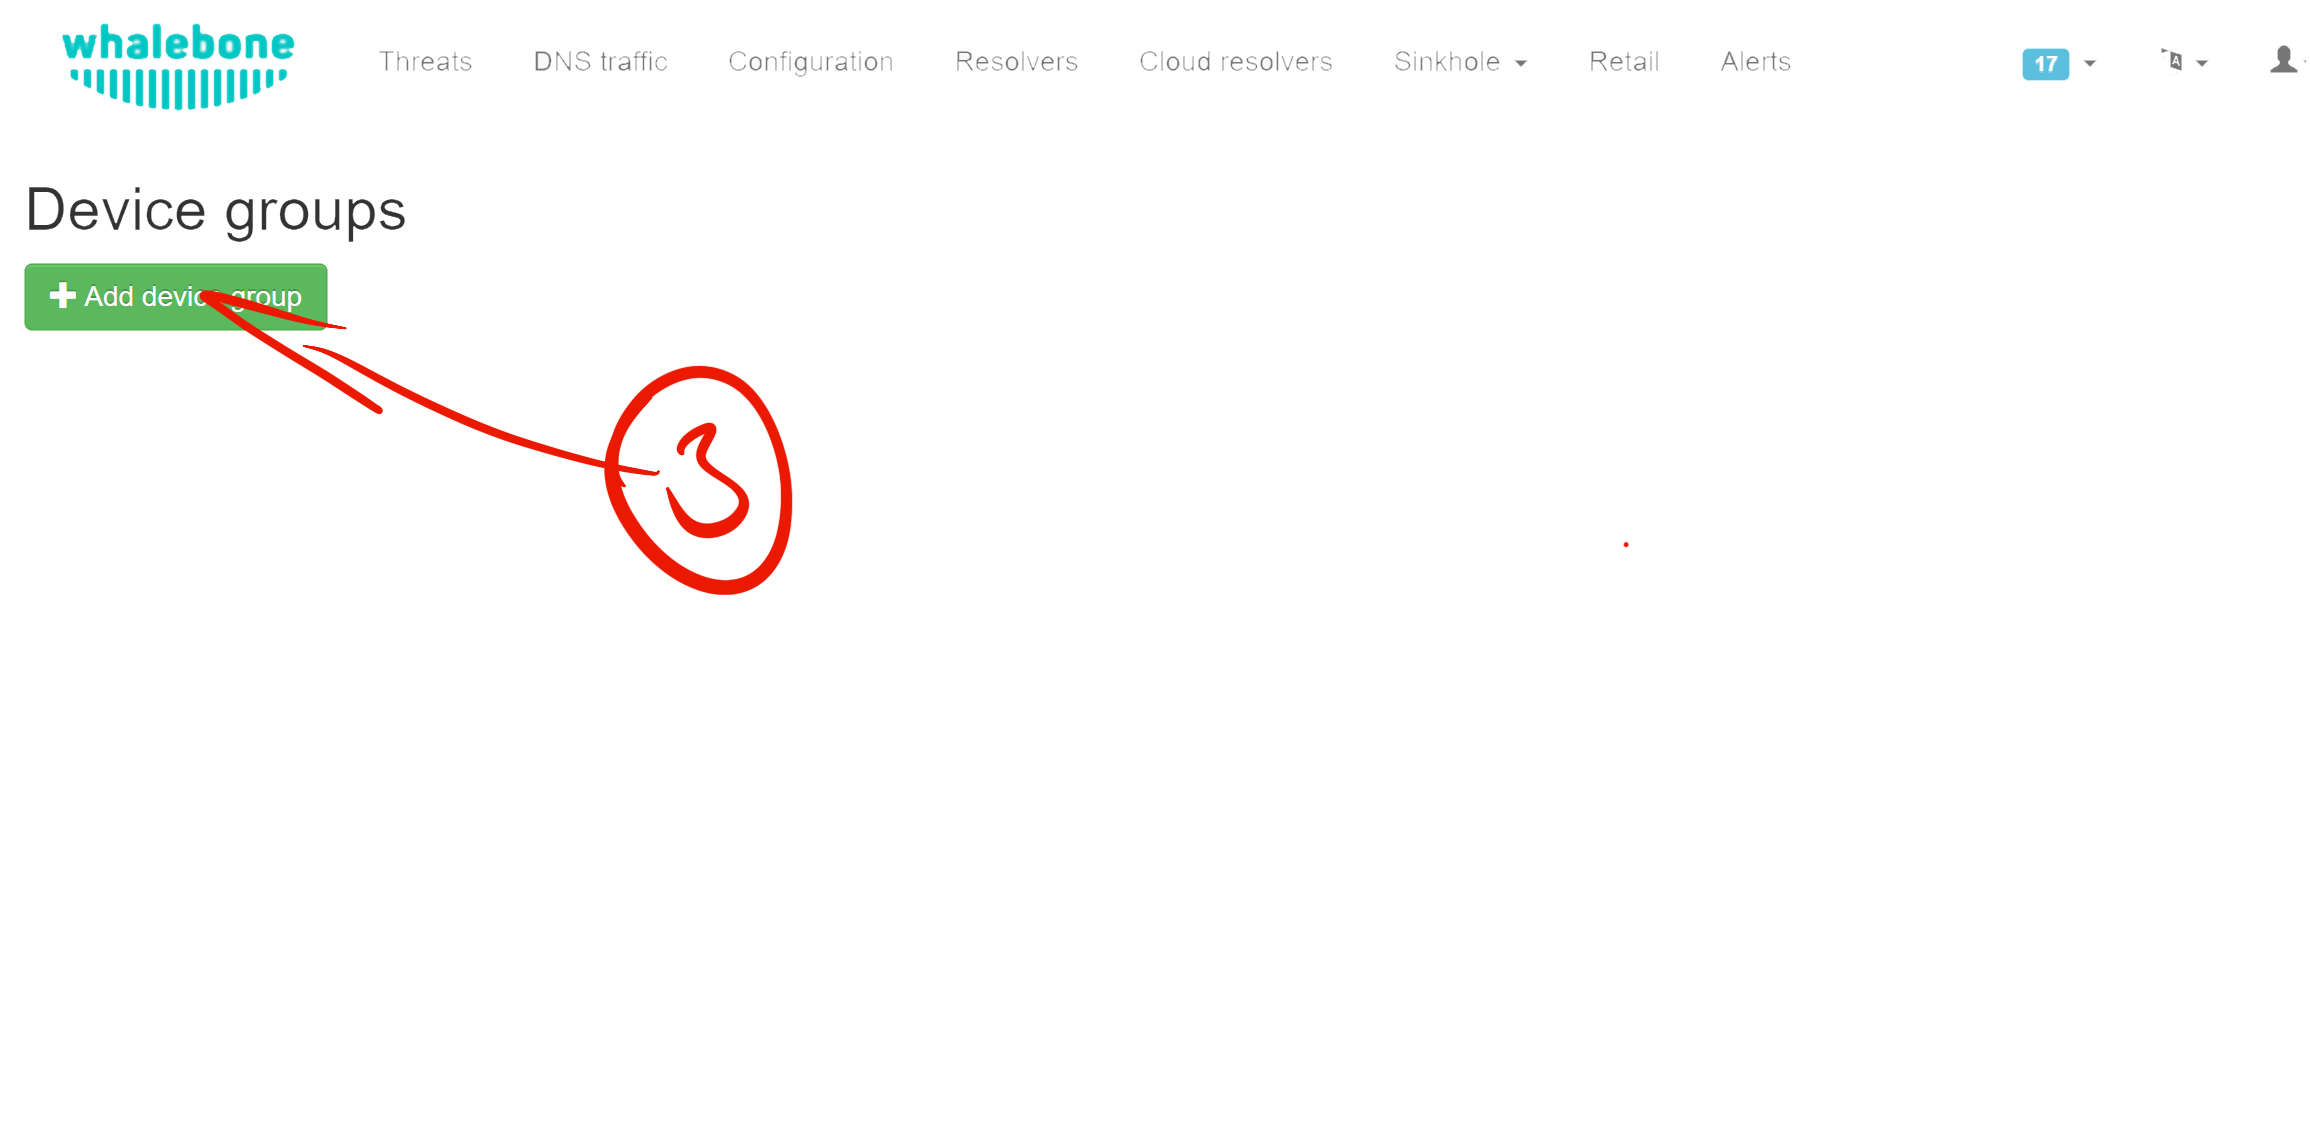
Verify or create a Device Group using the + Add device group button.
Device group configuration options:
Name: identifiable label, e.g., Default Group.
Policy: select your preferred security policy.
Blocking page: define which blocking template to display.
Domain exceptions: enter domains that should bypass protection.
Disable HOS inside corporate network: optional; define:
Internal Domain: the queried domain that is reachable only from the internal network.
Expected Response: value returned when inside the network.
Query Type: A / AAAA / TXT record, matching your DNS configuration.
Click Add to save the group.

Unattended Installation (Windows 64-bit)
Select the target group to which you want to add the newly installed client by clicking the Install to group button to download the application and display the installation commands.
Download the required installation file.
Copy the installation command from the Portal, for example:
msiexec /i "Whalebone.Home.Office.Security.Installer.msi" TOKEN="12345678-1234-1234-1234-123456789012" REGION="eu-01"
Use your preferred MDM to distribute the application to users by creating a new deployment with the command copied from the Portal.
Uninstallation
msiexec /x "Whalebone.Home.Office.Security.Installer.msi"
GUI Installation (Windows 64-bit)
Select the target group to which you want to add the newly installed client by clicking the Install to group button to download the application and display the installation commands.
Download the required installation file.
Double-click the downloaded MSI file to execute it.
Enter the pairing token that you can find on the Portal into the installer’s window. For example:
aG9zLmFwcDovL2F1dGg/dG9rZW49MTIzNDU2NzgtMTIzNC0xMjM0LTEyMzQtMTIzNDU2Nzg5MDEyJnJlZ2lvbj1ldS0wMQ==
Manual Installation (Android / iOS)
Select the target group to which you want to add the newly installed client by clicking the Install to group button, which displays download links and the activation QR code.
Send the link and the QR code to users.
Users will install the app and be prompted to scan the QR code to complete the installation process.
Post-installation verification
The device appears in the Portal → Home Office Security → Devices list after successful registration.