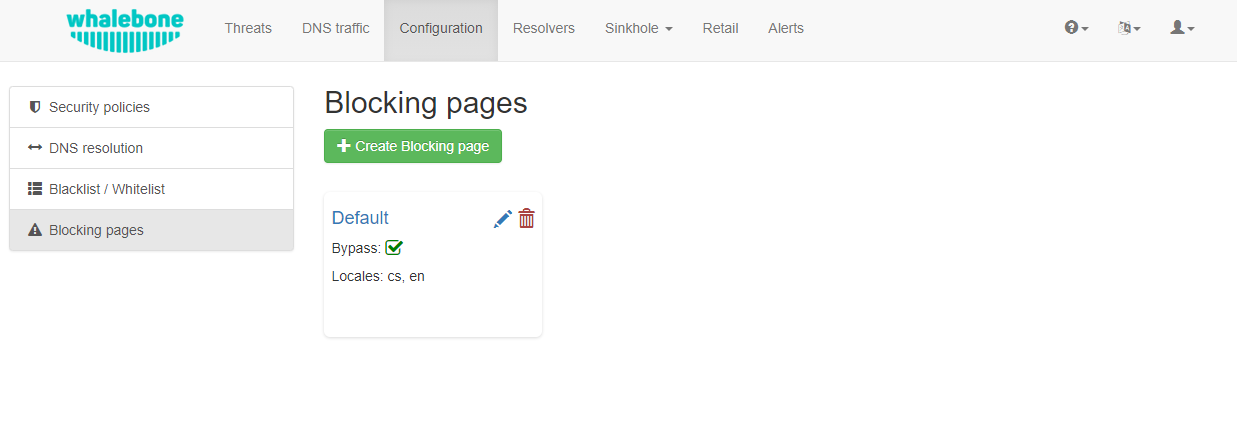
Blocking Pages
You can watch step-by-step video guide here.
In case of blocking access to a domain (due to security, content or regulatory reasons), the resolvers are answering to the clients with a specific IP address that leads to one of the Blocking pages. While the clients initiate the HTTP(S) connections towards the blocked domain, they are presented with a custom Blocking page with different content based on the reason of the blocking. For the Blocking Pages Whalebone provides sample template, however, they do not have to be followed and virtually every modification, branding and copywriting is possible. The template code is written to be compatible with the widest range of browsers to avoid problems with older versions.
Different versions of the Blocking Pages can be assigned to different segments of the networks in Resolvers → Policy assignment.
Blocking Pages Overview
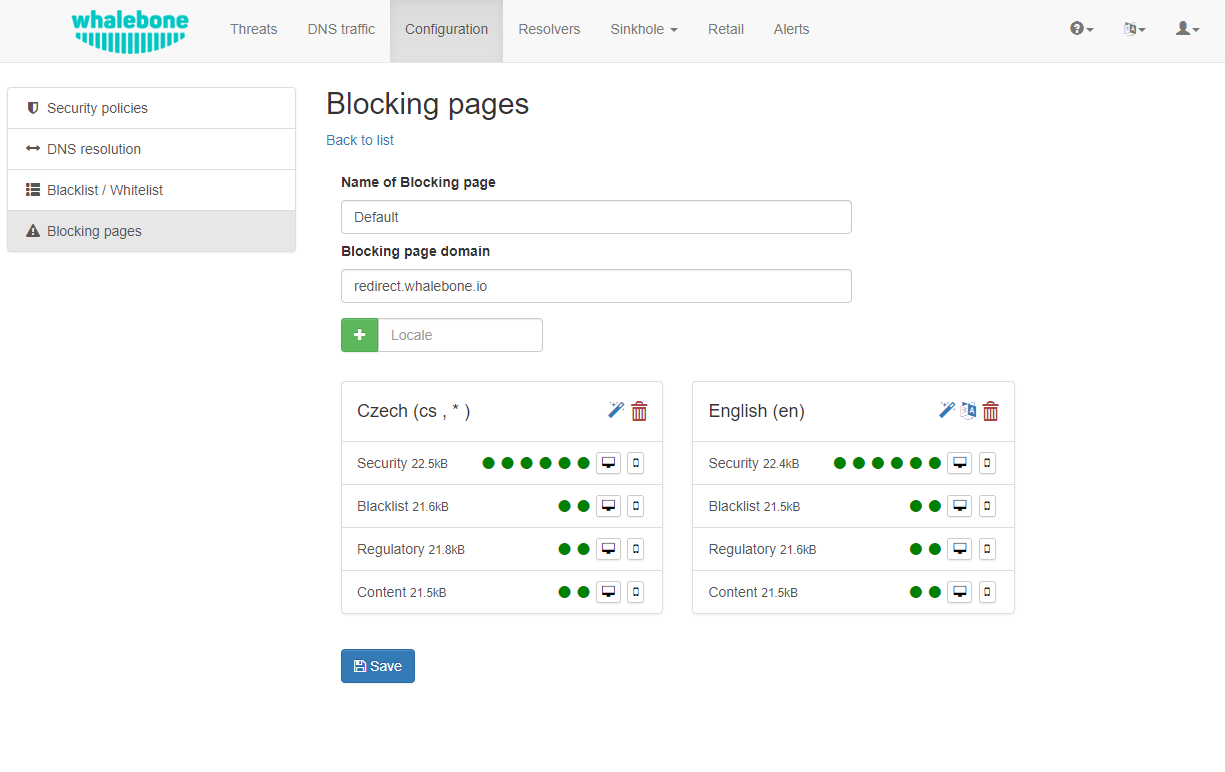
For each version, based on the deployment details, there are four variants of the Blocking Pages that are available and can be configured:
Security: displayed when access is blocked due to security reasons
Blacklist: displayed when access is blocked by the Administrators
Regulatory: displayed when access is regulated due to law or court order
Content: displayed when access is blocked due to the content of the domain
Furthermore, each version can have different localization options. The language that is going to be presented to the user is infered from the language of the browser that is visiting the Blocking Page. New locales can be seamlessly added as an option.
Blocking Pages Menu
For each Locale several options are available. In the example above, the English version has the following options:
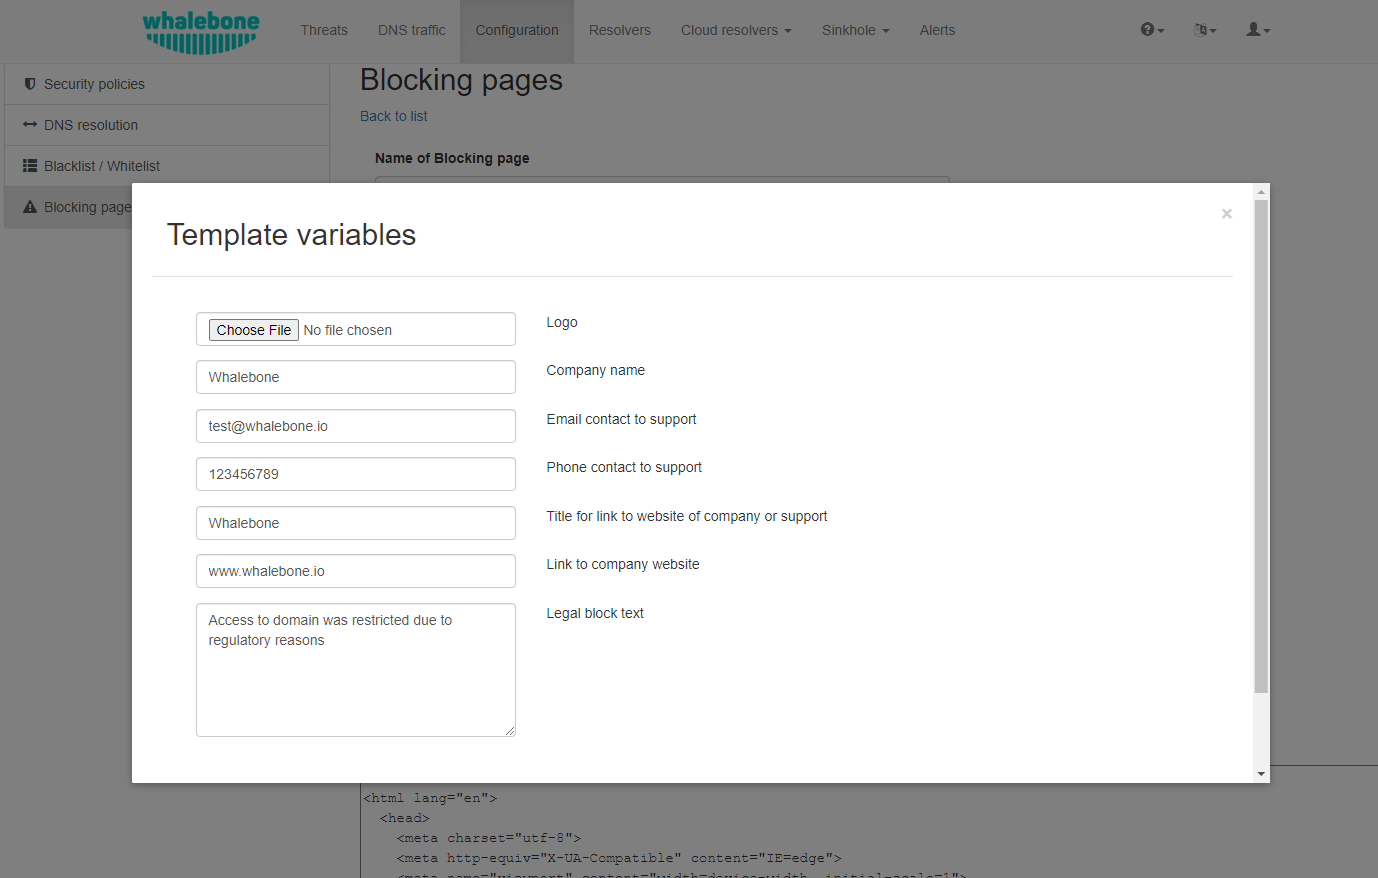
Option 1. – Use Template:
When using the template option, the information that is provided as input to the following form are injected in the template code. This is the fastest and easiest way to customize the blocking pages.
Note
Setting the blocking page could be done clicking on the Magic wand button. Note that it will override the previous version of blocking page.
Option 2. – Set as default locale:
This option can customize the default language of the Blocking Pages. In case some browser does not declare its preferred language, the “Default” language acts as a fallback mechanism. Default locale is indicated via wildcard symbol (*) next to the langue type.
Option 3. – Delete the locale:
Locale could be deleted clicking on Bin icon.
Each of the Versions of the Blocking Page (Security, Blacklist, Regulatory, Content) can be customized in more detail by modifying the HTML code. Upon clicking on each version an editor is presented that allows for any required changes.
The editor also exposes a “Verification” interface which parses the final HTML code and checks for the enabled functionalities. The check is based on the id of the specific elements. More information and requirements for each functionality can be found by clicking the respective labels.
Note
Each Version of the Blocking Page has unique characteristics that can be selected. For example, the Security Blocking Page can include a “Bypass” button which is not available in the respective Regulatory and Blacklist versions.
After editing and saving the changes to the Blocking Pages it is important that they are applied to the individual resolvers.
Tip
The Blocking Pages are served from a web server directly on the Resolver. The pages are expected to be a single file so any additional resources (CSS, images, scripts) must be either embedded directly in the HTML code or served from a publicly accessible web server. The resolver does not provide any option to serve other content.
Signing blocking pages with a CA
For deployments, where you have control over the endpoints (typically enterprise environment with Group Policy) and you’re able to push self-signed SSL certificates to their trust stores, you can sign the blocking pages on the fly. This results in the browsers going directly to the blocking page without displaying the security warning, which is usually there. The resolver essentially performs a MITM any time it redirects to the blocking pages so the browser warning is expected.
Step 1. – Create “v3_cfg” file with the following contents:
[req]
req_extensions = v3_ca_extensions
distinguished_name = req_dn
[v3_ca_extensions]
basicConstraints = CA:TRUE
subjectKeyIdentifier = hash
authorityKeyIdentifier = keyid:always,issuer:always
keyUsage = cRLSign, keyCertSign
subjectAltName = @alt_names
[alt_names]
DNS.1 = localhost
[req_dn]
countryName = Country Name (2 letter code)
countryName_default = US
stateOrProvinceName = State or Province Name (full name)
stateOrProvinceName_default = New York
localityName = Locality Name (eg, city)
localityName_default = New York City
organizationName = Organization Name (eg, company)
organizationName_default = My Organization
commonName = Common Name (eg, your name or your server's hostname)
commonName_max = 64
Step 2. – Generate a key:
openssl genpkey -algorithm RSA -out /certs/ca.key
Step 3. – Create and sign the certificate:
openssl req -x509 -new -nodes -key /certs/ca.key -sha256 -days 1024 -out /certs/ca.crt -config /certs/v3_cfg
Step 4. – Export the .pfx file and make sure it is placed in the /certs/ folder:
openssl pkcs12 -export -in ca.crt -inkey ca.key -out ca.pfx -certpbe PBE-SHA1-3DES -keypbe PBE-SHA1-3DES -macal
Step 5. – Send the filename and password to Whalebone support to store the configuration persistently on the back-end to ensure that it survives the VM or container restart.